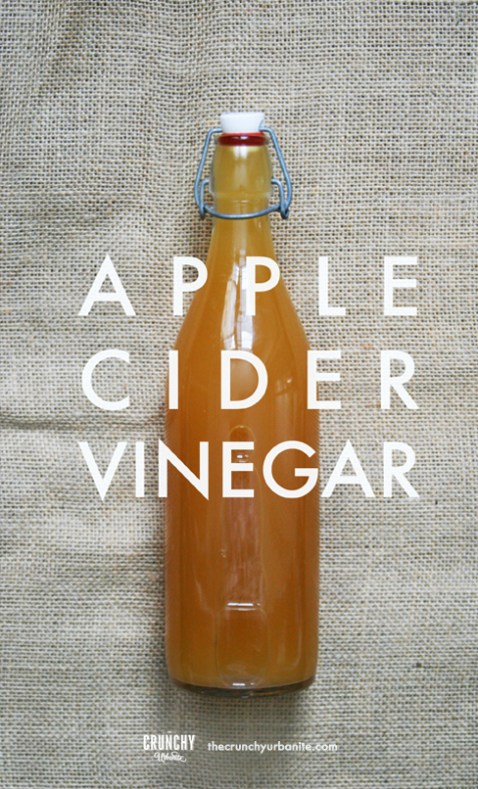
I go through a lot of apple cider vinegar. Like, a lot. But buying the good stuff was starting to add up, and I thought: Can’t I just make this myself? So I did.
Ironically, the hardest part about making apple cider vinegar was getting consensus on how to start. I found thousands of instructions — all reputable, but all wildly different. Some said it took weeks, other said months or years. Some used scraps, others used juice. Some left it alone, others added sugar or honey. Some even recommended bugs. I wasn’t sure which was best… so I tried them all. (Well, except for the bugs.)
But now I can now confidently say, this is how you make apple cider vinegar. Or: How I learned to stop worrying and love the mother.
What you’ll need:
- Apple scraps
- Large-mouth jar
- Sugar (raw or white, preferably)
- Water
- Cheese cloth, coffee filter, paper towel, or pantyhose
PHASE 1: Get ‘er started
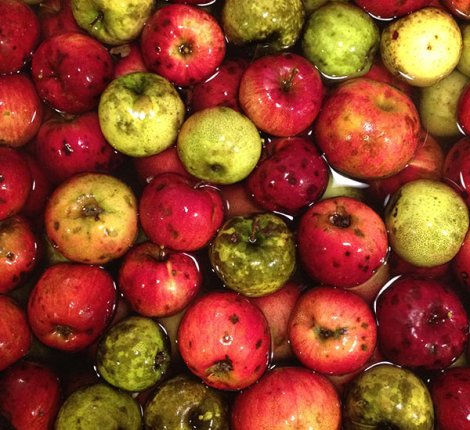
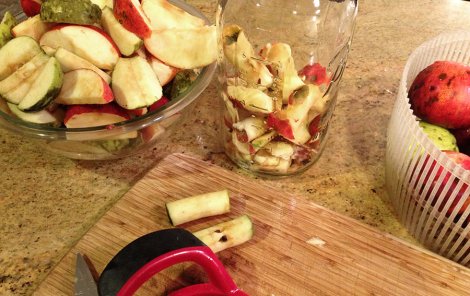
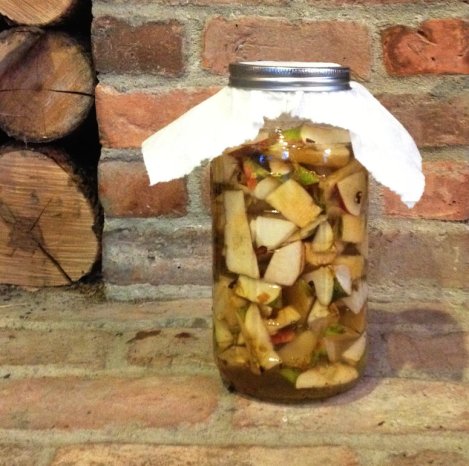
1. Apples.
The next time you’re using apples for something — juicing, or baking, or just munching on one as a snack — save the scraps. The cores, the skin, even those little bruised bits you always cut off. Take all these pieces and toss everything into a jar until it’s about 75% full. I use half-gallon jars.
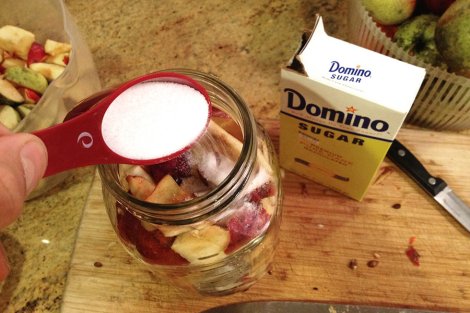
2. Sweeten, inoculate, and fill.
Add about ½ cup of sugar (per half-gallon / 2 L) and fill the rest of the way with water, leaving a few inches at the top. Stir until the sugar is mostly dissolved, but you don’t have to be a perfectionist.
If you have some store-bought apple cider vinegar like Bragg’s, add a hearty splash. The microorganisms from the old vinegar will help jump-start your homemade stuff, which will drastically speed up the process. (If you don’t have any store-bought, hey, don’t sweat it.)
A quick note on sugar: As a rule, I try to avoid it; so the first time I made vinegar, I skipped this step. Then a couple months later, I couldn’t understand why my vinegar wasn’t vinegaring. Sugar is what your living cultures convert into alcohol, which then turns to vinegar. No sweet? No sour. You can use any kind, but I recommend white or raw. Brown sugar and molasses take longer to break down and will double or triple your fermentation time. Honey is naturally antiseptic and will actually inhibit the flora you’re trying to encourage. I tried coconut sugar once and don’t recommend.
3. Cover, but don’t seal.
Cover the jar securely with something that will keep critters out but still let it breathe. Something like cheese cloth, paper towel, or pantyhose. I really like coffee filters.
4. Leave it alone.
Put somewhere dark, cool but not cold, and forget about it. Your apple scraps need to ferment.
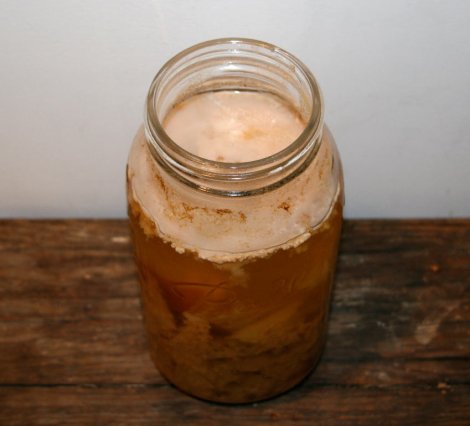
The timing on this can vary. Some people say several weeks, others say several months up to a year. I’ve found 2-4 months, especially if I’ve added a good amount of sugar, is good. Check your jars and if the apple scraps have sunk to the bottom, there’s a good chance it’s finished. The liquid surface will also likely have a blubbery layer called a vinegar mother. (A very good sign.)
A little mold above the surface is to be expected. One thing I love about ACV is its microorganisms and human beings have the same enemies, so you can rest assured that if there’s something in your vinegar that’s not good for you, your vinegar cultures are making quick work of them.
When your vinegar smells of vinegar, the apples have fallen to the bottom (or at least look very waterlogged), and you have a mother growing up top — congrats, you’re finished with Phase 1.
Behold! Apple cider vinegar.
PHASE 2
1. Filter.
Once you’ve gone as far as you can go in the first phase, transfer your vinegar through a sieve into new jars. (I’ve tried cheesecloth and pantyhose to filter, too, and the apples tend to mush and clog it up. Not worth it.)
2. Give it a home.
You can begin using this ACV now, if you like, or follow the next few steps to make it even better. Either way, your new vinegar will want a permanent home, so I recommend another large jar or even an iced tea dispenser. Again, you’ll want to leave it open to the air, but protected by a barrier like pantyhose or paper towel.
If you saved the mother from the end of Phase 1, you can add it back into the vinegar again, or watch as your vinegar grows a new mother anyway.
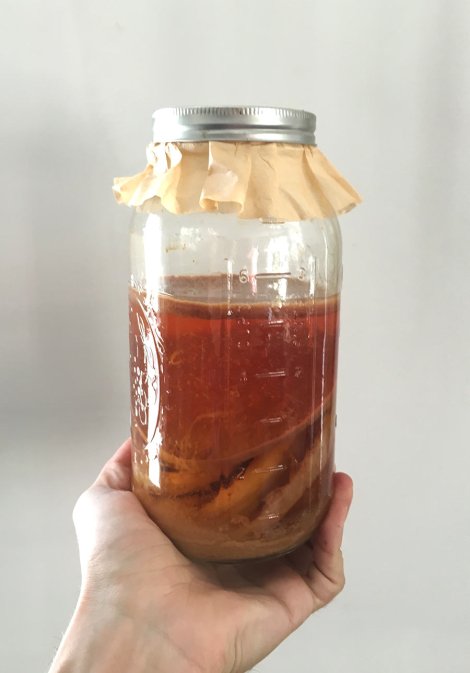
Filtered ACV happily doing its thing with several mothers.
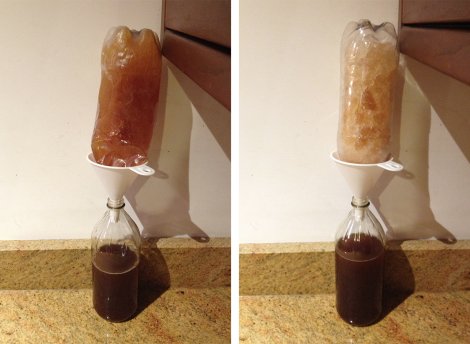
3. Concentrate your vinegar
If you taste your ACV at this point, you may notice it’s not nearly as acidic as what you’re used to. Store-bought apple cider vinegars are typically around 5% acidity.
Luckily, there’s a very simple way to remove excess water from your new vinegar — without harming your cultures.
Freeze your vinegar in a plastic bottle overnight, then leave it to thaw upside-down over a second bottle. The acetic acid melts first and will make its way through the ice before much of the excess water does. You can repeat this step however many times as you want.
PHASE 3: On-going Maintenance
1. Routine feedings.
Vinegar will keep forever. (I had a neighbor with a vinegar mother he told me that had come over on the Mayflower.) But you will need to feed it.
For apple cider vinegar, a splash of fresh apple juice every few months should suffice. Less is more. I lost a several-year-old batch by overfeeding and it molded. (Yes, I sobbed for days.)
2. Long-term keeping.
If you go ahead and bottle your finished vinegar for the pantry as if it were a store-bought variety, you’ll need to keep an eye on the pressure. Bear in mind, a 5% acidity ACV with little to no food source is totally shelf-stable. But the living cultures will continue to do their thing. I’ve opened a bottle left in the cabinet once and it hissed, so just be aware.
NOTE: You can of course boil your vinegar to pasteurize it, as I’ve read some people suggest, but this means all your beneficial microorganisms — and hard work — are officially dead. (Think of the children…)
PRO-TIPS:
Much to my surprise, I’ve been making vinegar for several years at this point. Here are some mega-extra-bonus tips I’ve learned along the way.
Fermenting is not rotting. The first time I made hard cider the old-fashioned way, I was terrified it would go bad. Once I started actually trying to get things to go bad, I was amazed how difficult it actually was. Again, you’re cultivating microorganisms who are on your side and who are fighting to keep their environment safe and happy for themselves — which means safe and happy for you.
Start a freezer bag. I have neighbors upstate with apple trees, so once a year I have literally more apples than I know what to do with. But for the rest of the year, I find it’s handy to collect apple scraps in a freezer bag. Apple cores, cut-off bruised pieces: anything that lends itself well to vinegar-making goes in the freezer bag. And when I finally have enough to fill a jar, I make a new batch.
Don’t use juicer leftovers. It makes perfect sense: use the pulp leftover from making apple juice and turn that into vinegar. Ounce for ounce, pulp has more surface area than apple scraps, right? Well, I tried this and it really seemed to smother the process, like a wet blanket. I had a couple jars and they yielded sour-ish water, and never true vinegar. Tempting as it may seem, stick with the scraps.
Treat your chickens. If you keep backyard chickens, then you probably know that ACV is beneficial to them. The vinegar straight from Phase 1 is a healthy probiotic drink, and they will happily devour your apple-scrap discards once you filter them out to start Phase 2. (Unsolicited rant: I want backyard chickens.)
Zero waste. When you make vinegar, you’re turning byproduct into new product. And if you compost, you can manage to squeeze out yet another use. One bunch of apples has managed to be so many things along the way. I love that.
Bad batches are good batches. Remember I said I ruined a batch by overfeeding it and it molded? Well, it was still perfectly-good vinegar, so I just demoted it to utility vinegar. Vinegar foot soaks are great for athlete’s foot, and its high acidity makes vinegar a wonderful (and biodegradable) weedkiller.
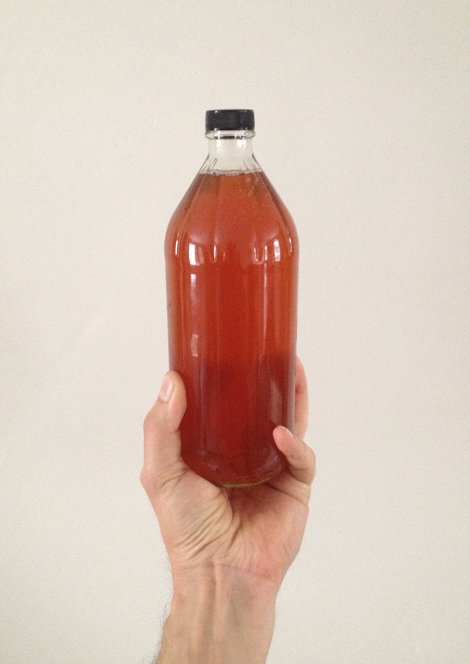
Look, Ma! I made apple cider vinegar.
It may seem like a lot to take in right now, but I assure you, it’s not. Making your own apple cider vinegar is literally one of the easiest, most rewarding, not to mention coolest homesteading-type projects you can do.
Minor confession? The first time I made a salad and dressed it with my own vinegar was kind of revelatory. No joke.


Wish I still lived in Michigan surrounded by Apple trees to try this
Thank you Chris, this is invaluable to me.