
Let me preface this by saying I don’t smoke. (Militantly so.) But I do have to understand how everything is made. So when I learned that the flowering tobacco I had growing was honest-to-god tobacco, I knew I would have to give proper cigar-making a shot.
The variety of tobacco I use here is a white flowering variety called nicotiana alata. There are many kinds, and it’s n. tabacum that’s conventionally used in cigars and cigarettes. Sometimes called “peace pipe tobacco,” n. alata has smaller leaves than n. tabacum, but still perfectly usable.
A note on toxicity. Before beginning, I quadruple-checked that the tobacco variety I was planning to use wasn’t poisonous. Guess what I found out: They’re all poisonous. That’s what nicotine is: a nerve toxin the tobacco plant produces to defend itself. It’s geared towards paralyzing insects who might eat the leaves, but affects animal cells, too. Interesting, right?
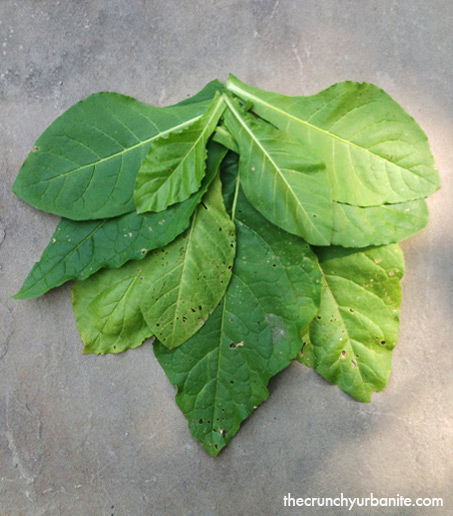
First, harvest your tobacco leaves.
True cigar people will advocate leaving your tobacco to cure in a warm, dry location (think: attic) for a year or more. (I found one person who said a decade, because that’s just so practical.) But for a basic homemade cigar, the consensus I found felt that 3 months to cure was perfectly adequate. (Another guy said even 2 weeks worked great for him.) Generally, the longer your leaves cure, the more mellow and pleasant the finished product.
Not being a smoker or particularly hell-bent on any finished product past accomplishment, I went with around 3 months.
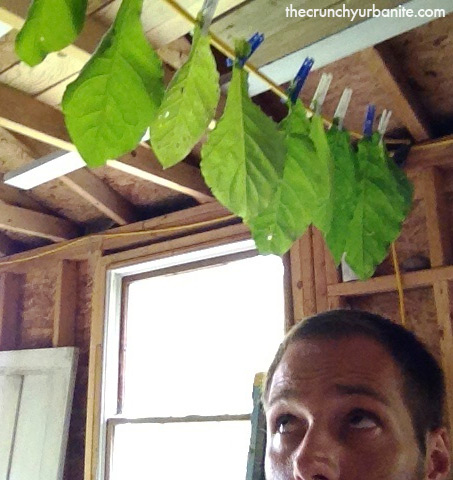
I left my tobacco to cure in a garden shed at the peak of summer. Dry, out of direct sun, and definitely warm. It didn’t matter if the leaves picked up any dirt because everything gets a thorough washing before rolling.
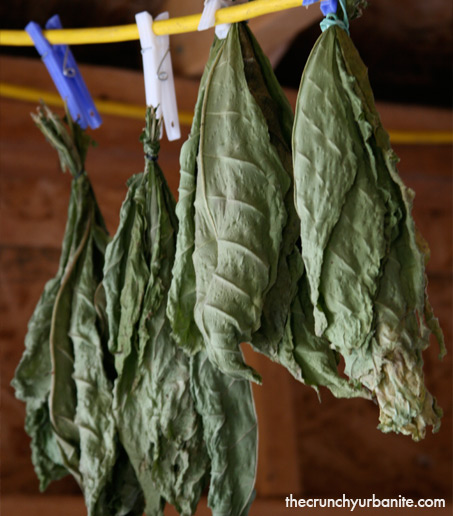
By the end of the summer, the leaves were ready to take down.
Think of a cigar like big, leafy sushi roll. There’s the large outside wrapper and there’s all the choice stuff inside. All your cured tobacco gets wadded and rolled together, so it doesn’t matter if the leaves are big, small, torn, whatever. But for the outside wrapper, you’ll want at least 1 or 2 large, intact leaves.
Interestingly enough, these outer leaves can be cured like the filler tobacco, or you can leave them to dry in the sun for as little as 2 days. The wrapper is more functional than actual substance.

Wash your tobacco. In addition to cleaning off any dust your leaves might have picked up during the curing process, wetting the leaves helps to make them malleable and easier to roll.

Set your larger, intact leaves to the side to use as wrappers. Now take all your filler leaves and cut out the stem. In fish terms: de-bone them.
This can be done simply by folding your tobacco leaves in on themselves and cutting away the spine.

Next, take your mass of filler leaves and create a rough form of a cigar. It’s all right if it’s a bit crude-looking because your outer leaves will be the final wrap.

Once you have the basic body of your cigar formed, roll it in the large outside leaves. Keep the roll as taut as possible, but without tearing.

You may want to do a couple passes at the outside wrapper.
On your final layer, roll your cigar into your last leaf at an angle so that it starts at one side and ends at the other.

Like an old-fashioned hotdog, you’ll want a little extra material at the ends. When you’re finished rolling, give both ends a good twist, then cut off the excess with a knife or scissors, but leave enough so that your cigar doesn’t come undone as it dries.

Now leave your cigar somewhere dry for a week or so.
The curing process has already taken place, so this is literally to dry out the moisture from the washing and rolling.
Once your cigar is dry, you’re good to go.

So there you have it. Your very own homemade, homegrown cigar.
I’d love to tell you that I lit it up with a glass of my best Scotch and it was absolutely amazing, or that I took one look at it and threw it away and spent the rest of the day telling children how dangerous smoking is. But the truth is, I was so impressed with the fact that I’d actually made a cigar from start to finish like some old Cubano that it just sat there until it disintegrated and I finally just tossed it on the compost pile. (Ha!)
¡Viva la cigarificación!

BONUS:
Natural pesticide. Not into cigar-making? No worries. You can also use nicotiana leaves to make a natural insecticide. Steep dried tobacco in water and make a tea, then spray it on your garden vegetables to protect them from pests. Nicotine is a natural poison, remember?
